Not only did I redesign my whole layout, I changed my name too...
Just a quick post today letting you know I will be changing my URL soon to match my new name.
Let me know what you think, how it looks, if you can read everything.
I've been looking at everything for quite awhile now so I'm going to take a step back and leave it alone for now.
Real nail post coming soon promise...
Formerly "Confessions of a Nail polish Junkie" but still just the ramblings of a girl who loves nail polish, books, and anything that sparkles.
May 30, 2012
May 23, 2012
ASBMF- Matte Magic
For this mani I wasn't sure if I wanted just matte or shiny/ matte. I'm still on the fence about matte polish and the matte look. I'm just love the shiny look, and matte feels funny to me, yes I know I sound like a 5 year old when I says "it feels funny". That's ok with me, besides anyone that has worn matte polish will know the "feel" I"m talking about, it's odd. All in all I'm just not sure. Ive actually never worn a "matte" polish just the matte top coats. I think it's more because I would feel weird not applying a top coat, also I"ve heard that most matter polishes are a pain to work with and chip very quickly, no idea if that's true or not though. In my mind I just ask myself why would I want my nails to not be shiny? Lol,, then proceed with my super shiny Seche Vite. What can I say the stuffs awesome.
Anyway what was I saying... oh yes I was deciding between just matter and matte/ shiny. At first I stuck with just matte, then the next morning I used some craft scissors with a squiggly (totally technical work BTW) edge to cut some tape. Let me tell you cutting tape with those scissors is not easy, they just do not want to cut, ugh. But finally I did get enough strips for all my nails. Then place tape on nail, paint shiny Seche Vite, pull up tape. That's it. Ok enough talk on to the pictures.
See the weird bump on my pointer finger... Dunno what happened luckily by the time I was done it disappeared.
Anyway what was I saying... oh yes I was deciding between just matter and matte/ shiny. At first I stuck with just matte, then the next morning I used some craft scissors with a squiggly (totally technical work BTW) edge to cut some tape. Let me tell you cutting tape with those scissors is not easy, they just do not want to cut, ugh. But finally I did get enough strips for all my nails. Then place tape on nail, paint shiny Seche Vite, pull up tape. That's it. Ok enough talk on to the pictures.
See the squiggly line in the middle of each nail... Hopefully anyway maybe not on the accent nail, it's there but hard to see. I think this would of worked better on a darker base, but oh well this is what I was working with.
Used;
Base coat
Orly- Faint at heart (grey)
Ulta- Indigo-Go Girl (glitter over grey)
Accent nail
Ulta- Maine Attraction (teal)
China Glaze- Lorelei's Tiara (glitter over Teal)
Below are base colors before glitter with flash...
ignore those dry hands please
Now on to the rest... first 4 in artificial light, last 4 in natural indirect sunlight.
The last pics were taken a few days after applying, So I think my matter was turning kinda shiny. Kills the effect, but enjoy the colors
May 22, 2012
ASBMF- Glitter Tips
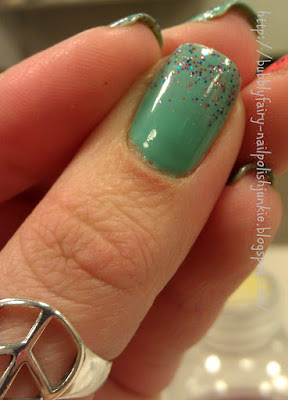
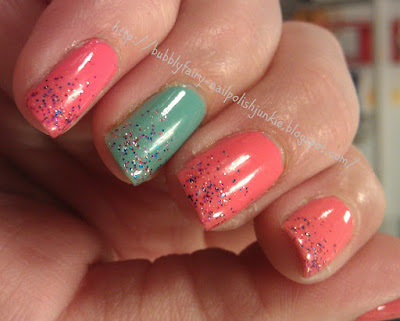
So when I think glitter tips, I think sponging on a gradient so of course that's what I went with. Nothing too fancy just a little fun. On to the pictures...
Used:
Base Coat
Essence- You belong to Me (Blue) 2 coats
Sally Hansen- Coral Reef (Pink) 2 coats
and for the glitter I used
Nyc- Big City Dazzle
I really Enjoyed wearing this mani, both colors wore amazingly well I actually wore this for 4 or 5 days, I don't quite remember but I wore it way longer than I usually do. I just did not have any time to change it. Ugh hate when that happens but love when my mani holds up, Yay!
I just love having a sort of reverse accent nail. Lol no idea what to call it actually. Where you wear a main color on each hand but switch the accent nail to other color on either hand.
If that made any sense anyway, you get the idea right? lol. Ok going to quit rambling now.... Enjoy....
May 19, 2012
ASBMF- Ombre
I had never actually attempted the ombre mani before this, I was trying to figure out what color to use I thought orange would be good, but when I got together some orange polishes I didn't like how they looked together. So I went for a different take on the ombre look, I pulled up a color wheel to look at and chose the Yellow to green section to re-create. Which would be Yellow, Yellow- Green, and Green. Once I picked whats colors I wanted I had to pick polishes to match the color. Now that was an annoying task, I must of looked at 5 different yellows and like 10 greens, I guess when you have so many polishes you bring this on yourself. But I don't mind I actually kind of enjoy looking through all my babies trying to find the right color, All the while picturing certain ones in my head to match up then pulling it out and it not quite being what i seen in my head. lol yea it's a process but like I said I enjoy it.
ok enough talk on to my pictures,
ok enough talk on to my pictures,
Fogive the slight mess around my cuticles, I hadn't fully cleaned up when I took the photos.
Used:
Revlon- Sunshine Sparkle
Sinful Colors- Innocent
Sally Hansen Xtreme Wear- Going Green
In order from base color to tip on the accent nail.
I used this design from NailSide she calls them clouds. This was my first time trying this technique which is really simple actually. I definitely need some practice though. But I was happy with this.
My Favorite nail all the parts of the cloud came out almost perfectly round.
Which I was happy about, but both fingers on my left hand came out better than my right hand, but I'm a lefty how the hell did that happen, I suppose I'm more careful with my right hand lol, who knows.
May 12, 2012
ASBMF- Rainbow after the rain
For this mani I didn't want to do a full nail rainbow like I have before, I went for a rainbow glitter accent nail and blue. I'm not sure if I'm completely happy with the end result but I wore it for a couple days, it was just very bright and sparkly...
Used:
Base Coat
2 coats Sally Hansen Blue Away
2 coats Sally Hansen Spectrum
Accent Nail: one hefty coat OPI- Rainbow Connection
All topped with Seche Vite
I thought A multi colored glitter with "rainbow" in the name was a nice fit, I really do love glitter accent nails need to do them more often.
Thats all for now enjoy.
May 8, 2012
Bundle Monster Contest
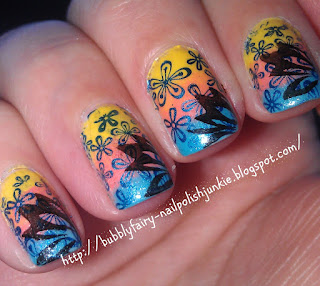
This is actually my first time entering in one of their contests. This time it's to win their new set of stamping plates, they have released a few teaser pics and so far the designs are just so cute I can't wait to get them. It would be awesome to win a set. Anyway enough talk on to my entry.
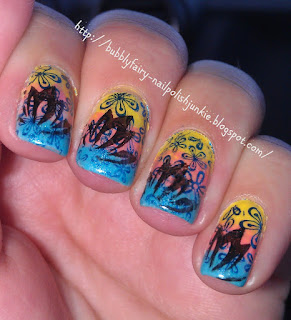
So I thought long and hard about what to do for the contest. I knew I wanted some sort of gradient with double stamping on top. Then it was picking the colors, I finally settled on these three colors. So I went to work.
Used: Base Coat
Base color: Sally Hansen- Sheer Vanilla
Gradient using: Sinful Colors: FireFly, Luminary, and Sweet Dreams
Stamping Colors: Sally Hansen- Aquamarine Chrome (anyone remember these? Chrome Nail Makeups were awesome)
Wet N Wild- Black Creme
All topped with Seche Vite
If you like what I came up I would love your vote, Voting is taking place all this week you can vote once a day every day. If you do want to vote for me just click here.
If any of you entered the contest leave a link to your entry in the comments and I'd love to vote for ya.
May 6, 2012
ASBMF- #4 April Showers...
For this mani I knew what I wanted to do, just wasn't sure of how to achieve the look I was going for. After a few days of not having time and thinking it over I finally had the time to sit down and carry out my plan. I ended up using the water color technique. If you don't know the technique or how to do it, check out this post from Rebecca at Rebecca Likes nails, she explains it way better than I could. And is just awesome all together.
So the idea was to make my nails storm clouds, with water drops like from a car window. So not sure if it worked entirely but I'm happy with it.
Used:
Base Coat
Base color: Sally Hansen- Wet Cement
Other colors: in order
Sally Hansen- Barracuda
Opi- Suzi takes the wheel
Wet N Wild- Black Creme
Opi- Skull And Glossbones
all topped with Sally Hansen Glass Slipper
Then topped with China Glaze Matte Magic
Then added randon dots and lines in Opi Topcoat. (not sure if its real visible in the photos, honestly it's hardly visible to me and I know it's there.)
Below is Wet Cement with topcoat in natural sunlight, also the other pics in sunlight were taken right after I was done, my hands were a mess, and I even tried to clean up, well I use tried a bit loosely I gave up pretty quick figured I'd pick it all off later.
Next Pictures are in artificial light
Subscribe to:
Posts (Atom)


